A few weeks ago I posted about designing and printing a simple 3D part. This post will be about a more complex object, using a different design tool.
I’ve wanted to build a custom sundial for my home for years. I have a book (actually, more than one) about designing sundials. The primary one I use is Sundials: Their Theory and Construction by Albert Waugh. This book has lots of information about various types of sundials and includes formulas for designing sundials. I have thought about designing and building a traditional sundial that would be mounted in my front yard, or maybe a vertical sundial on my garage door (which gets sunshine much of the day, but not late afternoon). But that hasn’t happened.
Now that I have a 3D printer, I decided I could make a small sundial (my printer’s print bed is only about 9″ across) using that. I searched for designs, but couldn’t find a sundial I liked in the normal places to find 3D objects to print. I found one that was OK on Thingiverse, but it wasn’t really what I was looking for. Time to design my own!
I wanted to be able to easily modify the sundial for different locations. After all, if I’m going to make a dial for myself, I’m sure I have friends that would like one. And I want to easily customize it to make different sizes.
The sundial I found on Thingiverse had the base and gnomon (that’s the piece that sticks up to cast the sun’s shadow) all in one piece, which made it rather bulky to send in the mail. I wanted something that could be made flat for shipping. So the gnomon needed to be separate from the base, but easily attached.
With all of these requirements, it seemed to me I needed something that I could specify parameters to make it easy to customize, and then based on these parameters do “a lot of math” (not actually so much, but sines and cosines, at least). This is a different way of design than using Fusion 360 or some other similar CAD program, like I did the for the protective feet in a previous blog post. I needed something that could calculate angles and create shapes based on these calculated angles. Is there such a thing? But, of course! There is OpenSCAD, “The Programmers Solid 3D CAD Modeller”. This tool is basically a programming language in which you describe shapes. You write a program, which can include parameters which are used in the calculations. Just what I needed for this project!
The first thing I did was to determine what parameters I would need, i.e., the values I would want to be able to easily change. Obviously, the latitude and longitude of the location where the sundial would be “installed” would have to be easily changeable. What else? How about the size of the base so I could designate whether the sundial would be a 3″ dial, or a 6″ dial, or some other size. Here are the parameters I came up with (as shown in OpenSCAD):

In OpenSCAD, these are dimensionless parameters, but the sizes get interpreted in millimeters by my slicing program. So think of these as sizes in millimeters, except for the locationName, which is text, the latitude and longitude, which are degrees, and the timeZone, which is hours. So the dial described above is 120mm on a side, which is very close to 5 inches.
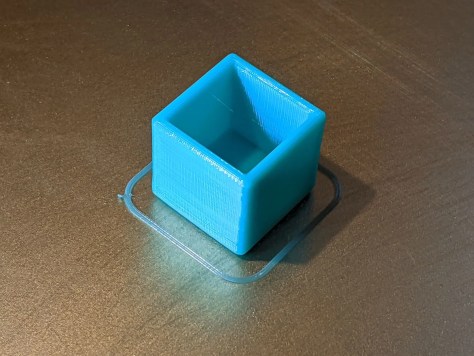
Here is a photo of the sundial base created by the above parameters:

Pretty simple, right? A Cuboid (a cube with unequal size sides) for the base, with another cuboid subtracted from it (the depression in the middle), a bunch of cuboids for lines added at various angles, and another cuboid subtracted from it where the gnomon will fit in, then some letters and numbers stuck to the top surface around the edges. Nothing to it! 🙂
And the gnomon is really simple. Just a cuboid the size of the slot it will fit into, and another cuboid to cut away the upper portion at the correct angle (the latitude of it’s location).

Once you print the base and the gnomon, the gnomon fits into the slot in the base:

With the base and gnomon apart, they can easily be mailed in an envelope. I have sent several to friends in padded envelopes, which can be sent inexpensively, with no problems.
Of course, this all seems simple now. I’ve already done it. Actually creating the sundial took me several days of work to get it just right. A lot of that time was learning OpenSCAD (I’m still just a novice), and also deciding how I wanted my sundial to look. Not to mention getting the formulas right for the basic dial. It took some time to get the hour numbers to print correctly on the dial border. Some of the logic was like, “if the hour line intersects the top border (not the left or right borders), print on the top border (centered vertically), otherwise print on the left or right border (centered horizontally), but don’t print on the bottom border (because the location text is there).” There are still some edge cases where the numbers print in the “wrong” location (which depends on your definition of wrong), but they haven’t occurred often enough yet for me to fix the logic.
For the curious, the code for the Gnomon is:
difference() {
    translate([0,-gnomonDepth,0]) cube([gnomonBaseLength, gnomonBaseLength+gnomonDepth, gnomonWidth]); // Full gnomon
    //subtract linear portion above gnomon
    rotate([0,0,latitude]) translate([0,0,-1]) cube([gnomonBaseLength*4, gnomonBaseLength*4, gnomonWidth+2]);
}
You might recognize some of the parameters to the cube() function as input parameters above, for instance gnomonDepth and gnomonWidth. The other parameters to the cube function (like gnomonBaseLength) are calculated from the input parameters.
If you are curious about the code, or want to print your own Square Sundial, my “Square Sundial” can be found on Thingiverse at https://www.thingiverse.com/thing:4802077.