


When camping, I frequently would like to know the temperature outside our 2020 T@B 320S Boondock Edge trailer as well as inside. I purchased a “ThermoPro TP60S Digital Hygrometer Indoor Outdoor Thermometer” through Amazon (if you purchase from this link I’ll earn a small commission at no additional cost to you) and mounted the indoor module on the wall next to the Alde control panel using Velcro.

Now, where to locate the outside sensor? I placed it in the propane tank / battery box, just setting it on the bottom. This seemed to work fine. The outside temperature seems to be relatively accurate except when the sun is shining directly on the box. The only problem I could see was that the sensor picked up a lot of dirt, and occasionally some moisture from sitting on the bottom. I was also concerned about dropping something on it and damaging the unit.

I have finally gotten around to moving the sensor to a safer location. I figured I could mount it over the flange at the back of the propane tank / battery box and it would be safely out of the way. When the lid is closed, there is a small gap below the lid where the mount can sit without interfering with the lid closing. Using Fusion 360, I designed a holder for the sensor.
I first measured the width of the flange at the top of the box, and eyeballed how I thought I would like the mount to sit on that flange. I measured the sensor, and made a rough drawing of what I wanted. Then I created a test part in Fustion 360. I just made the end of the sensor mount and about 10mm of the body. That way I could print it in a reasonable amount of time without using too much plastic filament to test the fit. Here’s my first iteration:

I then tested this, and found that it didn’t hang the way I had hoped. It needed something to keep it from tilting.

So, on to iteration #2. I added a little leg to keep it from tilting.

This worked fine. Now that I had tested the hanger, and believed it to be correct, I added the rest of the structure in Fusion 360, and added holes in the bottom to improve air flow to the sensor, resulting in the completed sensor holder.


In a previous blog I told about my new 3D printer, and showed a few photos of it printing objects that I had found online. What else can you do with a 3D printer? You can design your own items to print, and those can be anything you can imagine. They might be purely decorative, or could be functional. Here’s something simple that is functional.
Julie has a basket that stands on four metal legs. Unfortunately, the little plastic feet that went on the legs have long since disappeared, and now they scratch the floor.

Simple solution: make some protective feet.
Fortunately, this really is a simple solution. I have some filament that I can print called TPU (thermoplastic polyeruthane) which is flexible but also tough. It sounds like the perfect material for this.
I measured the leg, and it was just a little under 19mm across. So I needed to design a foot that would fit over this 19mm square leg, hold up to some use, and stay on the leg. I decided to make it 2mm thick, as that seemed like a good thickness to not be too flimsy, yet not be overkill.
I use Fusion 360 from AutoDesk for most of my 3D designing. It’s free for hobbyists, and very capable. There are many other 3D design programs that would have worked, but that’s the one I’m most proficient with at this time. Maybe I’ll switch in the future. There is a great open source 3D design program I’m interested in playing with, but for this project I used Fusion 360
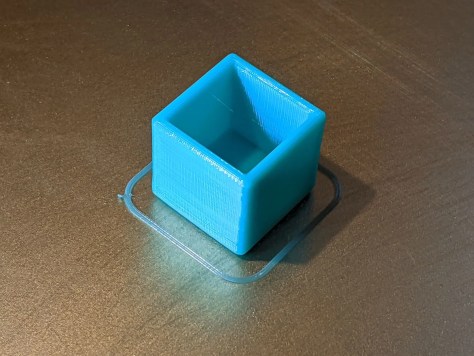
How would you go about designing a foot for this? It seems like a simple object, and it is. Just a cube with a hole in it. Like this:
I won’t go into any great detail about designing this, but will give some basic steps.


I think it looks good! Export it, Slice it, Print it. Test the fit…

It looks like a winner to me. It fits snugly, won’t fall off, and will protect the floor. The color? Just happens to be the color of TPU filament I have and a color Julie likes. Which is probably why I have this filament. 🙂
Watch for a future blog on designing a more complex object using a totally different 3D design program.

