Category Archives: Photography

Night Drone Photography

With recent changes to the FAA rules, it is now possible for drone pilots to fly at night without jumping through as many hoops as before. To be eligible to fly at night, I had to take the update course for my “Part 107” certificate. I also must have an anti-collision light on my drone that is visible for 3 miles in any direction (that sucker is bright!).

When flying at night, one needs to be very aware of their surroundings so as not to hit something that you can’t see. It’s best to check out the location in daylight hours to be sure there are no wires or other such items that you might encounter.

I flew my first night flight a couple weeks ago just to try it out. I flew from my deck, which is surrounded (and partially covered) by trees. I know where they are, and where on my deck I am clear of overhead obstructions. Landing is the tricky part — making sure that I am not descending into the trees or onto my roof. I was successful in flying a short flight and taking a few photos.

Several days later I flew from the Edmonds waterfront. I walked up the beach until I was clear of other beach-goers and had a good place to take off and land (a flat, almost-level, rock). My goal was to get some shots showing the Edmonds Ferry at or near the dock and the city lights of Edmonds. I was successful.

I flew my DJI Mini 2, which is very light-weight and has a 12 megapixel camera. I would like to try again with my DJI Phantom 4 Pro, which is heavier and has a better quality 20 megapixel camera. I think the heavier drone will probably be a bit more stable, which will improve the sharpness of the photos taken with the slow shutter speed required. Although, looking at the photos, the sharpness is quite good considering the camera is “sitting” on a platform floating in the air, subject to wind and motor/propeller vibration. Shutter speeds were between one third and one second with ISO varying from 1600 to 3200. With the small sensor on the DJI Mini 2, these high ISOs made for somewhat grainy photos.

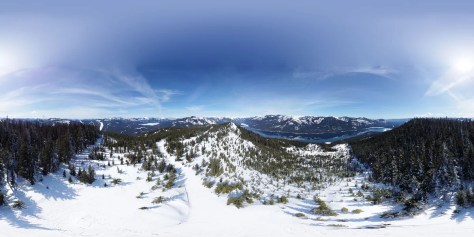
The photo below was shot as a series of nine RAW photos. The drone was positioned at one point in the sky, then three photos were shot using exposure bracketing (each photo with a different exposure) to capture the wide brightness range. Then the drone was rotated, and another three shots were taken. I did this three times. Each set of three photos was merged using Adobe Lightroom Classic to form one HDR photo, resulting in three HDR photos, each with a slightly different view. These resulting three photos were then merged into a single panorama photo, again using Lightroom, to create the final image.

Edmonds Waterfront
Edmonds Waterfront

Edit 2/13/22: If you want to see the above photo in larger size, look at my Flickr album here.

360° Panoramas (again)

In my last post, already several months ago, I promised another 3D printer post. That is still coming. It’s half written. Make that a quarter written. I’ve been sidetracked, not to mention that my laptop computer bit the dust and I haven’t yet decided what to replace it with.

My first 360° panorama post was a little over a year ago, Feb. 4, 2020, where I discussed how 360° panoramas were made and showed one from Gates Pass near Tucson, AZ. My second post on panoramas was written on March 9, 2020, noting that 360° panoramas could be displayed on YouTube.

So, what’s new with panoramas?

First, 360° can be displayed on Flickr (I knew that, but had never tried it). Here’s my first panorama on Flickr. Flickr isn’t as good at displaying these as it could be – maybe it will improve in the future. The first problem I noticed is at the very bottom of the photo – directly below the camera. There’s some distortion there that shouldn’t be. Also, it is more difficult to zoom in and out with the mouse scroll wheel, as it usually scrolls the page instead. And it was difficult to go into full-screen mode, and once there I wasn’t always able to pan around the image.

It is possible to display panoramas interactively on WordPress, but only if I pay for a “professional” level. Since I don’t make any money from this site, I can’t really justify doing that. If you wish to see my photo(s) in a better viewer, take a look at it (them) in Roundme. This photo was taken a few days ago while on a cross-country ski outing to the top of Amabilis Mountain. 11+ miles and 2000’+ elevation gain, but the views were totally worth it! What a gorgeous day we had. Here are the rest of the photos I shot that day.

You can see all of the photos I’ve uploaded to Roundme by going to https://roundme.com/@garystebbins/tours.

What else is new?

All of the 360° panoramas I have posted in the past were shot by using my DSLR camera mounted to a tripod (or, in one case, handheld). The latest two were shot from a drone from tens of feet to several hundred feet above the ground.

I got my first done 3+ years ago, but it’s a bit too big to take on a backpack or cross-country ski trip. About a month ago I got a much smaller drone that is something I can take along with me. The drone itself weighs about 1/2 pound. I carried it in my backpack on my cross-country ski trip.

Phantom 4 Pro and DJI Mini 2 drones

The larger drone in the photo above is a DJI Phantom 4 Pro, and the little guy is a DJI Mini 2. Both drones can automatically shoot a series of photos to be stitched into a 360° panorama photo. I then use the program PTGui to stitch the multiple images into a panorama image.

If you are curious, the panorama image is just a regular JPEG file, although it is stretched “a bit” at the top and bottom. As mentioned in my first post, it is exactly twice as wide as it is high – 360° wide and 180º high. The right and left edges join together in the panorama viewer, and the top and bottom edges are compressed to display as a single point – straight above the camera for the top edge and straight below for the bottom edge. Some additional metadata is added to the file so that the viewer program knows how to interpret the file. Here’s what the photo looks like when viewed without a panorama viewer.

Kachess Lake Overlook

There you have it – one more 360° blog post. Next (I hope) I’ll actually finish writing the 3D printer blog I promised a few months ago. Stay tuned!

Milky Way Timelapse

[Originally published Nov. 14, 2020, minor update Nov. 4, 2022]

Something I’ve wanted to do for years is to create a timelapse video of the night sky star motion. I made it one of my goals for this year to accomplish that. I’ve been spending a lot of time in places that have terrible views of the night sky. Mostly, too much atmospheric haze and/or too much light pollution.

In July, when Comet Neowise was visible, we found a place a short drive away that had a pretty good night sky view, and was above much of the haze. We went there to try to get a good view, and maybe a photo or two, of the Comet.

Comet Neowise, July, 2020 (15 seconds at f/4.5, ISO 800, 135mm)

We found that this location was also good viewing of the Milky Way.

Milky Way (30 seconds at f/4.0, ISO 1600, 10mm)

It might have been a good time to try for a star timelapse with the Milky Way included, but it was late and I didn’t take the time to try it.

In September we camped at Red Bridge State Wayside in Oregon. The campground is a great place, but the sky is mostly blocked by beautiful Ponderosa pine trees. It does have a pretty good view of the sky from an area near the parking lot. I took my camera and tripod with the hope of getting some decent sky images.

Toward dark I set up on the grass looking over the parking lot and took several test exposures. I was shooting with my Pentax K-3 (crop-frame) camera with a Tamron 10-24mm lens. The exposure I settled on was 6 seconds at f/3.5, ISO 6400. I set the camera to shoot 500 photos, one every 20 seconds. I turned off in-camera noise reduction, thinking I could save battery and do it in Lightroom later.

The first photo was shot at about 9:20 pm, and the last photo just past midnight. I sat in a chair near the camera for the almost three hours it took, reading a book on my Kindle. Fortunately the night was relatively warm and getting cold wasn’t too much of a problem. I did get out of the chair a few times to do some jumping jacks to stay warm.

OK, now for what I did wrong.

  1. I judged the exposure by what the image looked like on the back of the camera. Remember, it was almost pitch black when I was doing this. The image looked great! The next morning I looked at the images. I couldn’t believe that all frames were totally black. How could I have done that? Then I realized they were underexposed so badly that I couldn’t see anything in normal light, but, viewed in a darkened room, there was some image there. Don’t judge the image exposure by what your eye sees when its almost totally dark out! Lightroom to the rescue (sort of).
  2. Turning off in-camera noise reduction was a mistake. the Pentax K-3 does quite well at keeping the noise down, but at ISO 6400, I really needed to let the camera do what it could. Again, Lightroom noise reduction helped (but I wouldn’t say it rescued me).

Once I had 500 RAW images, I imported them all into Lightroom and did what I could to adjust exposure and reduce noise. Then exported them all as JPEG files (a painfully slow process on my ancient laptop computer). Next I fired up Adobe After Effects, brought in all of the JPEG images, and created a 1080p video at 30 frames per second. 500 frames at 30 frames per second results in a video only 16-2/3 seconds long!

The resulting video has lots of noise and color changes due to the extreme exposure adjustments I made. But I think it’s acceptable for my first attempt. Next year (or maybe this winter) I’ll do this again and improve my results.

Here is my video for you to see:

Milky Way Timelapse