Category Archives: Drone

Model of my Deck

I entered the following in the WebODM (Open Drone Map) forum. Some of it is a bit technical for this blog, but thought it might be interesting to some people.

Just for fun, and to learn more about WebODM and Blender, I flew my DJI Mini 2 drone around my deck to create a model. My deck has trees on 3 sides of it and overhanging it. Flying between the tree branches to get some of the shots was a bit challenging. There was a bit of a pucker factor a few times when flying inches below a branch and the drone started drifting upwards! (The Mini 2 has only forward and downward sensors, which is good here – I could never have flown that close to the trees if there were active sensors the other directions.)

I shot 142 images and processed those and saw some areas that didn’t seem to have adequate coverage. So I shot another 49 images to fill in some areas. That improved the places I concentrated on, but it seemed that some other areas decreased in quality. The glass railing and adjacent sunroom windows and doors caused some oddities, as expected. One thing I found odd is that the deck and other items seem to be “reflected” in the undersides of the tree branches.

My processing system is Windows 10 Pro on a laptop with 64GB of RAM. I initially processed this using Docker/WebODM, but ran out of memory when I increased pc-quality to ultra. I then processed it in Windows native WebODM, and it processed in 24+ hours. The WebODM timer showed 36 minutes, so I don’t have accurate information…

I postprocessed this with Blender to clean up some of the extraneous parts of the model, but purposefully left most of the trees. To get the upload files under the 100MB limit for the free Sketchfab account, I decimated the model in Blender to 70% and converted the PNG files to JPG.

Processing parameters:

debug: true, mesh-octree-depth: 13, mesh-size: 1000000, min-num-features: 30000, pc-quality: ultra, resize-to: -1, verbose: true

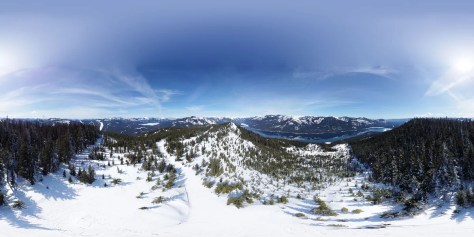
Click on the image below to activate the model. Use your mouse buttons to change the view, and your scroll wheel to zoom in and out. Type “F”, or click the double-ended arrow in the lower right, to open it in full screen. (I highly recommend viewing it in full screen.)

Night Drone Photography

With recent changes to the FAA rules, it is now possible for drone pilots to fly at night without jumping through as many hoops as before. To be eligible to fly at night, I had to take the update course for my “Part 107” certificate. I also must have an anti-collision light on my drone that is visible for 3 miles in any direction (that sucker is bright!).

When flying at night, one needs to be very aware of their surroundings so as not to hit something that you can’t see. It’s best to check out the location in daylight hours to be sure there are no wires or other such items that you might encounter.

I flew my first night flight a couple weeks ago just to try it out. I flew from my deck, which is surrounded (and partially covered) by trees. I know where they are, and where on my deck I am clear of overhead obstructions. Landing is the tricky part — making sure that I am not descending into the trees or onto my roof. I was successful in flying a short flight and taking a few photos.

Several days later I flew from the Edmonds waterfront. I walked up the beach until I was clear of other beach-goers and had a good place to take off and land (a flat, almost-level, rock). My goal was to get some shots showing the Edmonds Ferry at or near the dock and the city lights of Edmonds. I was successful.

I flew my DJI Mini 2, which is very light-weight and has a 12 megapixel camera. I would like to try again with my DJI Phantom 4 Pro, which is heavier and has a better quality 20 megapixel camera. I think the heavier drone will probably be a bit more stable, which will improve the sharpness of the photos taken with the slow shutter speed required. Although, looking at the photos, the sharpness is quite good considering the camera is “sitting” on a platform floating in the air, subject to wind and motor/propeller vibration. Shutter speeds were between one third and one second with ISO varying from 1600 to 3200. With the small sensor on the DJI Mini 2, these high ISOs made for somewhat grainy photos.

The photo below was shot as a series of nine RAW photos. The drone was positioned at one point in the sky, then three photos were shot using exposure bracketing (each photo with a different exposure) to capture the wide brightness range. Then the drone was rotated, and another three shots were taken. I did this three times. Each set of three photos was merged using Adobe Lightroom Classic to form one HDR photo, resulting in three HDR photos, each with a slightly different view. These resulting three photos were then merged into a single panorama photo, again using Lightroom, to create the final image.

Edmonds Waterfront
Edmonds Waterfront

Edit 2/13/22: If you want to see the above photo in larger size, look at my Flickr album here.

360° Panoramas (again)

In my last post, already several months ago, I promised another 3D printer post. That is still coming. It’s half written. Make that a quarter written. I’ve been sidetracked, not to mention that my laptop computer bit the dust and I haven’t yet decided what to replace it with.

My first 360° panorama post was a little over a year ago, Feb. 4, 2020, where I discussed how 360° panoramas were made and showed one from Gates Pass near Tucson, AZ. My second post on panoramas was written on March 9, 2020, noting that 360° panoramas could be displayed on YouTube.

So, what’s new with panoramas?

First, 360° can be displayed on Flickr (I knew that, but had never tried it). Here’s my first panorama on Flickr. Flickr isn’t as good at displaying these as it could be – maybe it will improve in the future. The first problem I noticed is at the very bottom of the photo – directly below the camera. There’s some distortion there that shouldn’t be. Also, it is more difficult to zoom in and out with the mouse scroll wheel, as it usually scrolls the page instead. And it was difficult to go into full-screen mode, and once there I wasn’t always able to pan around the image.

It is possible to display panoramas interactively on WordPress, but only if I pay for a “professional” level. Since I don’t make any money from this site, I can’t really justify doing that. If you wish to see my photo(s) in a better viewer, take a look at it (them) in Roundme. This photo was taken a few days ago while on a cross-country ski outing to the top of Amabilis Mountain. 11+ miles and 2000’+ elevation gain, but the views were totally worth it! What a gorgeous day we had. Here are the rest of the photos I shot that day.

You can see all of the photos I’ve uploaded to Roundme by going to https://roundme.com/@garystebbins/tours.

What else is new?

All of the 360° panoramas I have posted in the past were shot by using my DSLR camera mounted to a tripod (or, in one case, handheld). The latest two were shot from a drone from tens of feet to several hundred feet above the ground.

I got my first done 3+ years ago, but it’s a bit too big to take on a backpack or cross-country ski trip. About a month ago I got a much smaller drone that is something I can take along with me. The drone itself weighs about 1/2 pound. I carried it in my backpack on my cross-country ski trip.

Phantom 4 Pro and DJI Mini 2 drones

The larger drone in the photo above is a DJI Phantom 4 Pro, and the little guy is a DJI Mini 2. Both drones can automatically shoot a series of photos to be stitched into a 360° panorama photo. I then use the program PTGui to stitch the multiple images into a panorama image.

If you are curious, the panorama image is just a regular JPEG file, although it is stretched “a bit” at the top and bottom. As mentioned in my first post, it is exactly twice as wide as it is high – 360° wide and 180º high. The right and left edges join together in the panorama viewer, and the top and bottom edges are compressed to display as a single point – straight above the camera for the top edge and straight below for the bottom edge. Some additional metadata is added to the file so that the viewer program knows how to interpret the file. Here’s what the photo looks like when viewed without a panorama viewer.

Kachess Lake Overlook

There you have it – one more 360° blog post. Next (I hope) I’ll actually finish writing the 3D printer blog I promised a few months ago. Stay tuned!